

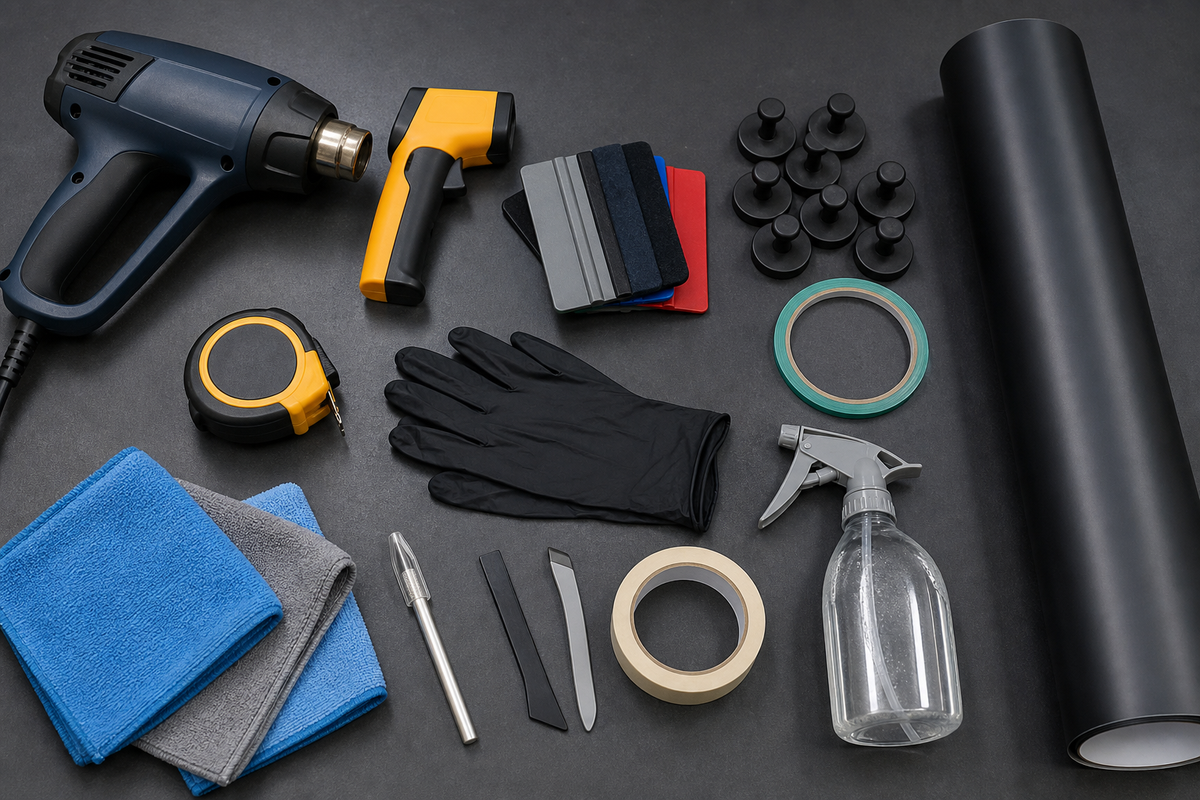
Quick answer: A complete wrap setup needs more than a squeegee and heat gun. Plan five groups: surface preparation, measuring and layout, positioning, application and heat control, and safe finishing. Clean tools and a controlled workspace prevent more defects than specialty gadgets.

| Stage | Essential tools | Purpose |
|---|---|---|
| Preparation | Wrap-safe cleaner, microfiber, clay, gloves | Remove contamination without reintroducing oils |
| Layout | Tape measure, masking tape, magnets | Plan panel pieces and alignment |
| Application | Felt squeegees, wrap glove, edge tools | Lay film without scratches or trapped air |
| Heat | Heat gun, IR thermometer | Relax and post-heat film accurately |
| Finishing | Knifeless tape, safe knife, light | Create controlled cuts and inspect edges |
Surface-preparation tools
Use clean microfiber towels separated by task, a paint-safe wrap cleaner, non-detergent wash supplies and suitable decontamination products. Nitrile gloves keep skin oils away after final cleaning. Never reuse a towel that has touched tire dressing, wax or greasy trim.
Preparation also includes lighting. Bright, color-neutral inspection lights reveal dust, adhesive residue, chips and failing clear coat before film hides the warning signs.
Measuring and layout tools
A flexible tape measure, masking tape, washable marker and panel worksheet turn a roll into an organized cutting plan. Strong wrap magnets hold large sheets during test positioning, but keep their bases clean so trapped grit cannot scratch paint.
Use a clean roll stand or supported core rather than letting vinyl drag across the floor. Mark film direction for metallic, pearl, color-shift and carbon patterns.
Squeegees, gloves and application aids
Keep several felt-edge squeegees in different stiffnesses. Replace dirty or damaged felt immediately. A wrap glove helps distribute pressure across curves, while narrow edge tools reach around seals and returns without substituting for proper trim removal.
A bundled vehicle wrap tool set can cover common basics, but inspect every edge before use and add professional-quality replacements for the tools you reach for most.
Heat control equipment
Choose a stable heat gun with controllable airflow and pair it with an infrared thermometer. The thermometer is essential because the gun’s dial does not tell you the film-surface temperature.
Use a heat-resistant rest, manage the cord and keep heat away from rubber, wiring and glass edges. An open-flame torch is not a universal substitute and may be prohibited by the film instructions.
Cutting and finishing tools
Knifeless tape reduces the need to place a blade against paint and is valuable for stripes, overlaps and design lines. A sharp precision knife is still useful for excess material, but blade depth and hand position require training. Never cut blindly over painted surfaces.
Add replacement blades, a blade disposal container, edge-seal products only where specified, and a small inspection mirror. Finish with a bright light and panel-by-panel checklist.
Workspace and safety materials
A clean indoor space with stable temperature, ventilation and room to open doors is part of the tool list. Control dust, route cables away from walking paths and keep chemicals labeled. Have eye protection and first-aid supplies available.
For correct heating technique, read our heat gun temperature guide before working on edges or recesses.
Frequently asked questions
What is the most important vinyl wrap tool?
A clean felt squeegee is central, but good lighting and surface preparation have equal impact on the result.
Do beginners need knifeless tape?
Yes. It helps create controlled lines while reducing direct blade contact with paint.
Can one tool kit wrap a whole car?
A kit is a starting point; add cleaning supplies, heat measurement, lighting, spare squeegees and safe cutting equipment.
Final recommendation
Use this guide to shortlist the right material and installation approach, then confirm the exact film specifications, vehicle condition and coverage before ordering. Product instructions and a written installer scope should always take priority over general estimates.

Surface preparation tools
Start with safe washing and decontamination equipment: clean buckets, wash mitts, microfiber towels, a suitable automotive cleaner and products approved for removing wax, grease or adhesive residue. Use separate towels for dirty first-pass cleaning and final panel preparation. Cross-contamination from tires, door shuts or old adhesive can compromise a clean-looking panel.
Add good lighting and inspection tools. A handheld light reveals dust, chips and residue along edges, while a small mirror helps inspect the underside of returns. Plastic trim tools may help access edges, but component removal should follow vehicle-service procedures. Store fasteners by panel and photograph assemblies before disconnection.
Application tools and consumables
Keep more than one squeegee. A medium felt-edge tool covers general work, a firmer option supports flat panels, and narrow tools reach controlled edge areas. Inspect felt before every panel; one embedded particle can scratch a long line. Wrap gloves help spread pressure on curves but should remain clean and be replaced when adhesive or debris accumulates.
Magnets can hold large sheets during positioning on compatible steel panels, while low-tack masking tape marks alignment points without drawing directly on the film. Do not rely on magnets near aluminum, composite or delicate surfaces. For large hoods, roofs and truck sides, a second trained person is often more valuable than another gadget.
Heat and temperature measurement
A controllable heat gun and infrared thermometer work as a pair. The gun provides energy; the thermometer checks the film surface where the result matters. Prepare a heat-resistant rest and route the cable away from doors and fresh material. Never place a hot nozzle on a bench covered with liner or solvent towels.
Different films specify different application and post-heating procedures. Keep the relevant technical bulletin accessible during the job. Do not write one favorite temperature on the wall and apply it to every material. Surface color, airflow, distance and panel substrate change heating speed, so move deliberately and measure.
Cutting, seams and edge finishing
Knifeless tape is valuable for stripes, overlaps and lines where direct blade contact with paint should be avoided. Learn how each filament behaves before using it on a vehicle; starting, pulling and corner technique affect the cut. A precision knife still has a place for excess outside the panel, but use minimal blade exposure and never cut blindly over paint.
Prepare spare blades, a closed disposal container, fine scissors where appropriate and edge tools that do not gouge trim. Edge sealer, primer or adhesive promoter should only be used when specified for the film and location. These chemicals are not a universal repair for tension, contamination or an incorrectly designed seam.
Workspace, safety and organization
A suitable workspace is part of the toolkit. It needs stable conditions, room to open doors, clean floors, good overhead and directional lighting, ventilation and controlled traffic. Keep pets, grinding dust, silicone sprays and body-shop contamination away. Label chemicals and retain their safety information.
Wear eye protection when a task presents risk, manage cords and hoses, and use an appropriate step platform instead of leaning over a roof from an unstable object. Plan breaks during long panels; fatigue leads to dropped tools, dirty gloves and rushed cuts. A written panel checklist keeps preparation, orientation, post-heating and edge inspection consistent.
Beginner kit versus professional inventory
A beginner can start with a small set of reliable tools, but should not omit cleaning, lighting or temperature measurement. Professional shops benefit from duplicates, replacement consumables, panel stands, organized storage and specialty tools for recurring vehicle types. Buy quality where failure touches the finish: squeegee faces, blades, measuring tools and heat control.
Use WINWAYWRAP to review wrap materials and installation accessories, then build the kit around the exact project rather than a generic box count. The goal is not to own the most tools; it is to remove avoidable risks at every stage from cleaning through final inspection.
Panel-by-panel workflow checklist
Before each panel, verify that the surface and underside edges are clean, the film piece has the correct orientation, and all tools are within reach. During application, record areas of meaningful stretch, keep the liner and tool faces off the floor, and stop when contamination or alignment requires a reset. Rushing to preserve a partly attached sheet often creates a more expensive failure.
At finishing, trim safely, press returns, post-heat only the required zones to the product specification, and inspect after cooling. Recheck corners, recesses and seams with directional light. Photograph the completed panel before reinstalling trim so the hidden edge condition is documented.
At the end of the job, account for every fastener and tool, clean the work area and give the owner product-specific care instructions. Record the film name, color, batch and installation date. These administrative tools are easy to overlook, yet they support warranty questions, color matching and later removal.
Tools that should not become shortcuts
Primer cannot rescue a dirty or highly tensioned edge. Heat cannot permanently shrink an over-stretched recess. A sharper blade does not make cutting on paint acceptable, and a stronger magnet does not replace a second person on an oversized sheet. Use each tool to support a sound technique, not to bypass substrate limits or planning. Replace worn consumables early; damaged felt, blunt blades and inaccurate measuring tools create preventable rework.
Share:
Heat Gun Temperature Guide for Vinyl Wrap: Application, Edges and Removal
Satin Black Wrap Care and Repair Planning: Sheen, Sizing and Cost