

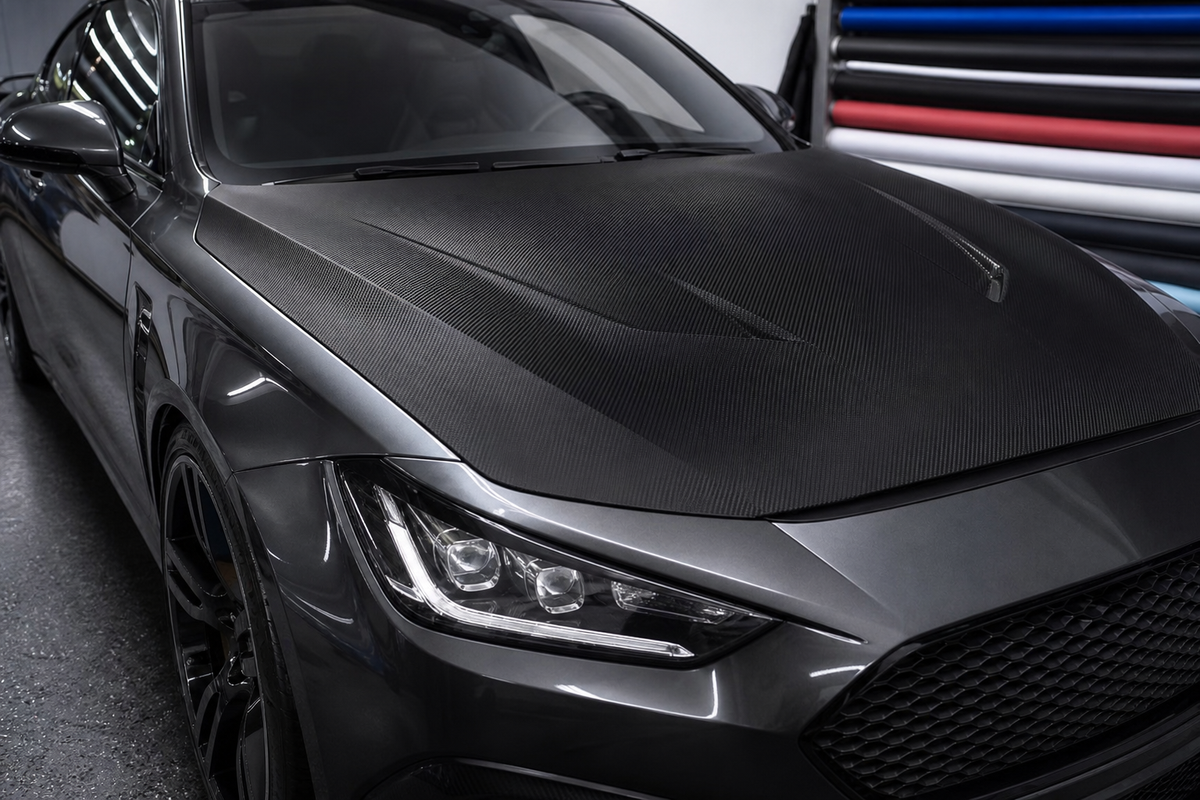
Quick answer: A professionally installed carbon fiber hood wrap commonly costs a few hundred dollars, while DIY cost is mainly the film and tools. Choose matte for a motorsport-like weave, gloss for resin-coated depth, or forged carbon for a bolder pattern. Measure the hood and buy one continuous piece with generous edge margins.

| Finish | Visual character | Good match |
|---|---|---|
| Matte carbon fiber | Dry, technical weave with low reflection | Track-inspired and understated builds |
| Gloss carbon fiber | Deep weave beneath a shiny resin-like surface | Modern performance cars |
| Forged carbon | Irregular chopped-fiber pattern | Bold accents and exotic styling |
| Colored carbon | Woven texture with a color tint | Coordinated custom themes |
Carbon fiber vinyl versus a real carbon hood
A carbon fiber vinyl wrap changes appearance without replacing the metal hood. It is far less expensive than a structural carbon component and can be removed, but it does not reduce weight or add rigidity.
The best films create believable depth through printed or embossed weave. Inspect a large sample because pattern scale, sheen and texture strongly influence realism.
How much does a carbon fiber hood wrap cost?
DIY cost depends on film size and tools already owned. Professional pricing reflects cleaning, removal of washer jets or trim, safe edge finishing and the difficulty of the hood shape. Large truck hoods, vents, deep scoops and old-film removal increase the quote.
Ask whether the underside return is included and whether vents will be wrapped separately. A low quote may cover only the visible top with short edge cuts.
Measuring the hood
Measure maximum width and length at the widest points, following curvature rather than only a straight center line. Add at least four to six inches on every side for positioning and wrapping edges. Confirm a single piece fits within the roll width.
If you are planning more panels, use our complete vinyl wrap size guide to calculate the whole project.
Installation overview
Wash, decontaminate and inspect the paint. Remove or loosen safe components that block the edge. Position the weave direction before peeling the liner, anchor the center or a stable body line, then squeegee outward with controlled tension.
Warm only as required to relax film around contours. Avoid overstretching because the weave becomes visibly wider and distorted. Trim with paint-safe technique, secure the underside returns and post-heat according to the film specification.
Choosing matte, gloss or forged carbon
Choose matte carbon fiber vinyl when you want the pattern to read without strong glare. Choose gloss carbon fiber wrap for a resin-coated look and stronger reflections.
Forged carbon is less traditional but visually powerful on vents, mirror caps and roofs. If combining panels, keep pattern scale and direction consistent enough to look intentional.
Care and removal
Hand wash with mild wrap-safe soap and clean microfiber. Do not polish a textured matte weave; residue can collect in the pattern. Remove bird droppings and insects promptly, particularly on a horizontal hood exposed to heat and sunlight.
Replace aging film before it becomes brittle. During removal, warm small areas and pull slowly at a low angle. Stop if the underlying paint is weak or lifting.
Frequently asked questions
Does carbon fiber hood wrap protect paint?
It provides a sacrificial vinyl layer against light contamination, but it is not equivalent to thick impact-protection PPF.
Can a hood wrap be one piece?
Usually yes when the hood fits within the roll width and lacks extreme vents or shapes.
Will the weave stretch?
Yes. Excess tension distorts the pattern, which is why layout and broad, controlled conforming matter.
Final recommendation
Use this guide to shortlist the right material and installation approach, then confirm the exact film specifications, vehicle condition and coverage before ordering. Product instructions and a written installer scope should always take priority over general estimates.

Decide what “carbon fiber” should look like
Carbon-style vinyl ranges from subtle printed weave to strongly embossed texture, glossy resin-like depth and irregular forged patterns. None of these materials turns a metal hood into structural carbon fiber; the choice is visual. Traditional woven patterns suit owners who want a motorsport reference, while forged patterns create a bolder contemporary accent. View enough material to see the repeat, because a pattern that looks natural on a small swatch may become obvious across a wide hood.
Gloss emphasizes depth and can resemble clear-coated composite under clean lighting. Matte reduces glare and makes the weave easier to read from more angles. Textured film feels tactile but can trap polish or wax in the pattern, so maintenance products must match the finish. Pair the hood with the vehicle's other surfaces: a satin body may support matte carbon, while gloss paint often coordinates naturally with a gloss weave.
Inspect paint before discussing price
Vinyl depends on sound paint. Look for failing clear coat, corrosion, stone chips, recent repair, contamination and old adhesive. A wrap may visually soften tiny color differences, but it will not stabilize loose paint. Removal can expose or worsen an existing weakness, especially on poorly repaired panels. Document the hood before installation and involve a paint professional when adhesion is uncertain.
Cost estimates should identify cleaning, old-film removal, washer-jet or trim access, vents, scoops, edge returns and any inlays. A smooth compact hood is different from a large truck hood with a raised center and fixed hardware. Ask whether the quote includes design alignment and underside finishing; two installers can describe “hood wrap” while offering different coverage.
Measure width, length and curvature
Measure the widest and longest usable dimensions, following the curve rather than only a straight line between corners. Add working margin on every side for holding, repositioning and wrapping the edge. Confirm the roll's usable width exceeds the planned piece. If the hood is wider than the film, redesign the project with a deliberate seam or choose another material instead of improvising midway.
Mark the front and center of the intended piece while the liner remains on. Decide whether the weave should run straight with the vehicle centerline or follow another design reference. For directional film, note the roll direction and preserve it if matching roof, mirrors or interior pieces will be wrapped later.
Create a clean installation environment
Wash the vehicle, decontaminate the hood and clean the panel edges and underside returns. Move indoors before final preparation so airborne dust does not settle on the adhesive. Use bright light across the surface, not only from above. Remove safe components when that improves access, but follow service information and protect surrounding panels.
Prepare clean felt squeegees, wrap gloves, masking tape or magnets for compatible panels, a heat gun, thermometer, knifeless tape where needed and safe finishing tools. Keep backing paper and cut scraps off the floor. Carbon patterns make some small marks less obvious than piano black, but contamination can still create bumps and local lift.
Position without distorting the weave
Dry-fit the sheet and check pattern alignment from the front of the vehicle. Create a stable hinge or anchor area, release the liner in controlled stages and work outward. Apply only the tension required to remove slack. If a wrinkle forms, lift and reset a broader area rather than heating and pulling one narrow spot until the weave stretches.
Use heat to relax the film around moderate curves, not to force it beyond its capability. Distorted carbon weave is especially visible because viewers use the pattern as a reference grid. On vents and sharp scoops, planned seams or inlays can retain a consistent pattern and reduce tension. Follow the film manufacturer's instructions for recesses, overlaps and post-heating.
Trim and secure the edges
Leave enough material for the intended return and make paint-safe cuts. Avoid sawing motions or deep blade pressure over the hood. Corners should lie flat without a bulky stack of vinyl; remove excess strategically while keeping the paint protected. Press edges firmly on a clean, dry substrate and inspect them after the film cools.
Post-heat stretched zones to the exact specification for the selected film and verify with a thermometer. Heating the entire hood indiscriminately is not the goal. Mark areas that received meaningful stretch during application so they can be treated methodically. Reinstall components carefully and make sure no fastener pinches or twists the vinyl.
Know when a professional is the better value
A simple flat hood can be a manageable first project, but very wide panels, deep vents, complex compound curves and expensive or fragile paint raise the risk. A professional brings controlled space, panel-handling experience and a seam strategy. Request examples using carbon-pattern film, because maintaining weave direction is a specific visual skill.
DIY costs include more than the sheet: cleaning materials, application tools, heat control and reserve film for a recut. If buying every tool for one hood approaches the labor difference, professional installation may be the better value. Conversely, a careful owner planning several panels can reuse equipment and gain useful practice on smaller pieces first.
Care for a horizontal carbon wrap
Hoods receive sunlight, engine heat, insects, bird droppings and road contamination. Hand wash with a mild wrap-safe cleaner, rinse thoroughly and dry with clean microfiber. Remove aggressive contamination promptly without abrasive scrubbing. Do not apply polishing compound to matte or textured carbon, and verify any coating or sealant on a spare piece first.
Inspect the leading edge, corners, vents and washer-jet openings regularly. Early edge lift should be assessed before water and dirt collect beneath it. Do not repeatedly press a contaminated edge back into place. A qualified installer can determine whether a small repair is sound or whether the panel should be replaced.
Removal and paint protection expectations
Carbon vinyl offers a removable styling layer and may reduce minor surface contact, but it is not an impact-focused substitute for paint protection film. If stone-chip resistance is the primary goal, compare a documented PPF solution. Material construction, installation method, appearance and cost differ, so choose protection first and pattern second.
Remove aging vinyl within the product's recommended service window. Warm small areas, pull slowly at a low angle and monitor the paint. Stop if clear coat lifts or if a repaired area behaves unpredictably. Adhesive residue should be removed with a compatible method rather than aggressive scraping.
Final hood-wrap checklist
Confirm paint condition, hood dimensions, roll width, pattern direction, finish, edge coverage, vent strategy, tools and product instructions before cutting. After installation, check pattern alignment from several angles, inspect edges after cooling, confirm post-heating, and record the product and batch details for future repair.
Explore carbon-style material options from WINWAYWRAP, but make the final selection with a large physical sample and a panel-specific plan. A convincing hood wrap comes from measured preparation and controlled weave—not simply choosing the most dramatic carbon pattern.
Design the hood as part of the whole vehicle
A carbon hood is most convincing when another small element repeats its finish or color. Mirror caps, a roof strip, spoiler or interior accent can create continuity, but using carbon on every available surface may weaken the focal point. Match weave direction where panels can be seen together and avoid mixing multiple pattern scales unless the contrast is deliberate.
Consider the hood gaps and adjacent fenders. A black carbon pattern can visually widen a hood on a light vehicle, while colored forged carbon may pull attention away from factory body lines. Photograph large samples from standing height and at road-view angles. Close-up texture alone does not reveal the final proportion.
Troubleshooting common hood-wrap problems
Silvered or pale lines in the weave often indicate stretch or trapped air; lifting and resetting early is safer than adding more heat. Repeating bubbles along an edge suggest contamination, tension or insufficient return. A skewed weave should be corrected during positioning, because trimming the perimeter will not make the center pattern straight.
If a defect appears after installation, do not puncture, cut or overheat the area without understanding the cause. Small issues may be repairable, but a visible central patch can look worse than replacing the hood sheet. Document the location and ask the installer to assess whether adhesion, substrate or technique is responsible.
Check a gloss carbon reference at hood scale
For a resin-like appearance, compare a large sample of 4D gloss black carbon fiber wrap across the hood center and edge. Viewing it at full panel scale makes repeating weave, gloss depth and stretch distortion easier to judge than a small swatch.
Share:
Black Truck Wrap Guide: Matte, Gloss and Satin Finish Comparison
Carbon Fiber Roof Wrap: Measurement, Weave Direction and Cost